How to Fix MacBook Pro’s Thermal Throttling

How to Fix MacBook Pro’s Thermal Throttling for Once and for All (Or Not…)
Disclaimer: We assume no responsibility for any damage caused to your personal goods. If you have zero experience in this matter, you WILL break your stuff. Use this guide at your own risk.
Apple’s ingenious business model made them what they are today: the first trillion-dollar company in the world. For years, they have been influencing the industry by incorporating new ideas to their products, which a lot of them were eventually used by other corporations as well (of course, the market is complex and every company exchanges (or steals) ideas from one another).
Their philosophy and ecosystem were always based on the user experience, how we perceive their products and how we interact with them. Personally, their devices have always been pleasing despite the numerous design flaws that came with them. For instance, the infamous MacBook recalls due to black screens caused by failing GPUs are one example that a lot of people may remember (even though this is also Nvidia’s fault).
As you may know, Apple has engineered the latest MacBook Pros to be as thin as possible. Unfortunately, this approach also comes with many caveats. One of the biggest ones is the design of the thermal cooling system. For instance, Apple products’ cooling fans run at lower RPMs so that they are quieter for the user’s comfort, but which also causes the system to overheat. And even when the fans are on full blast, the system still overheats. The fans are clearly not the only culprit here (yes, I’m looking at you, Mr. Heatsink). This not only shortens the computer’s lifespan, but also thermal throttles its performance.
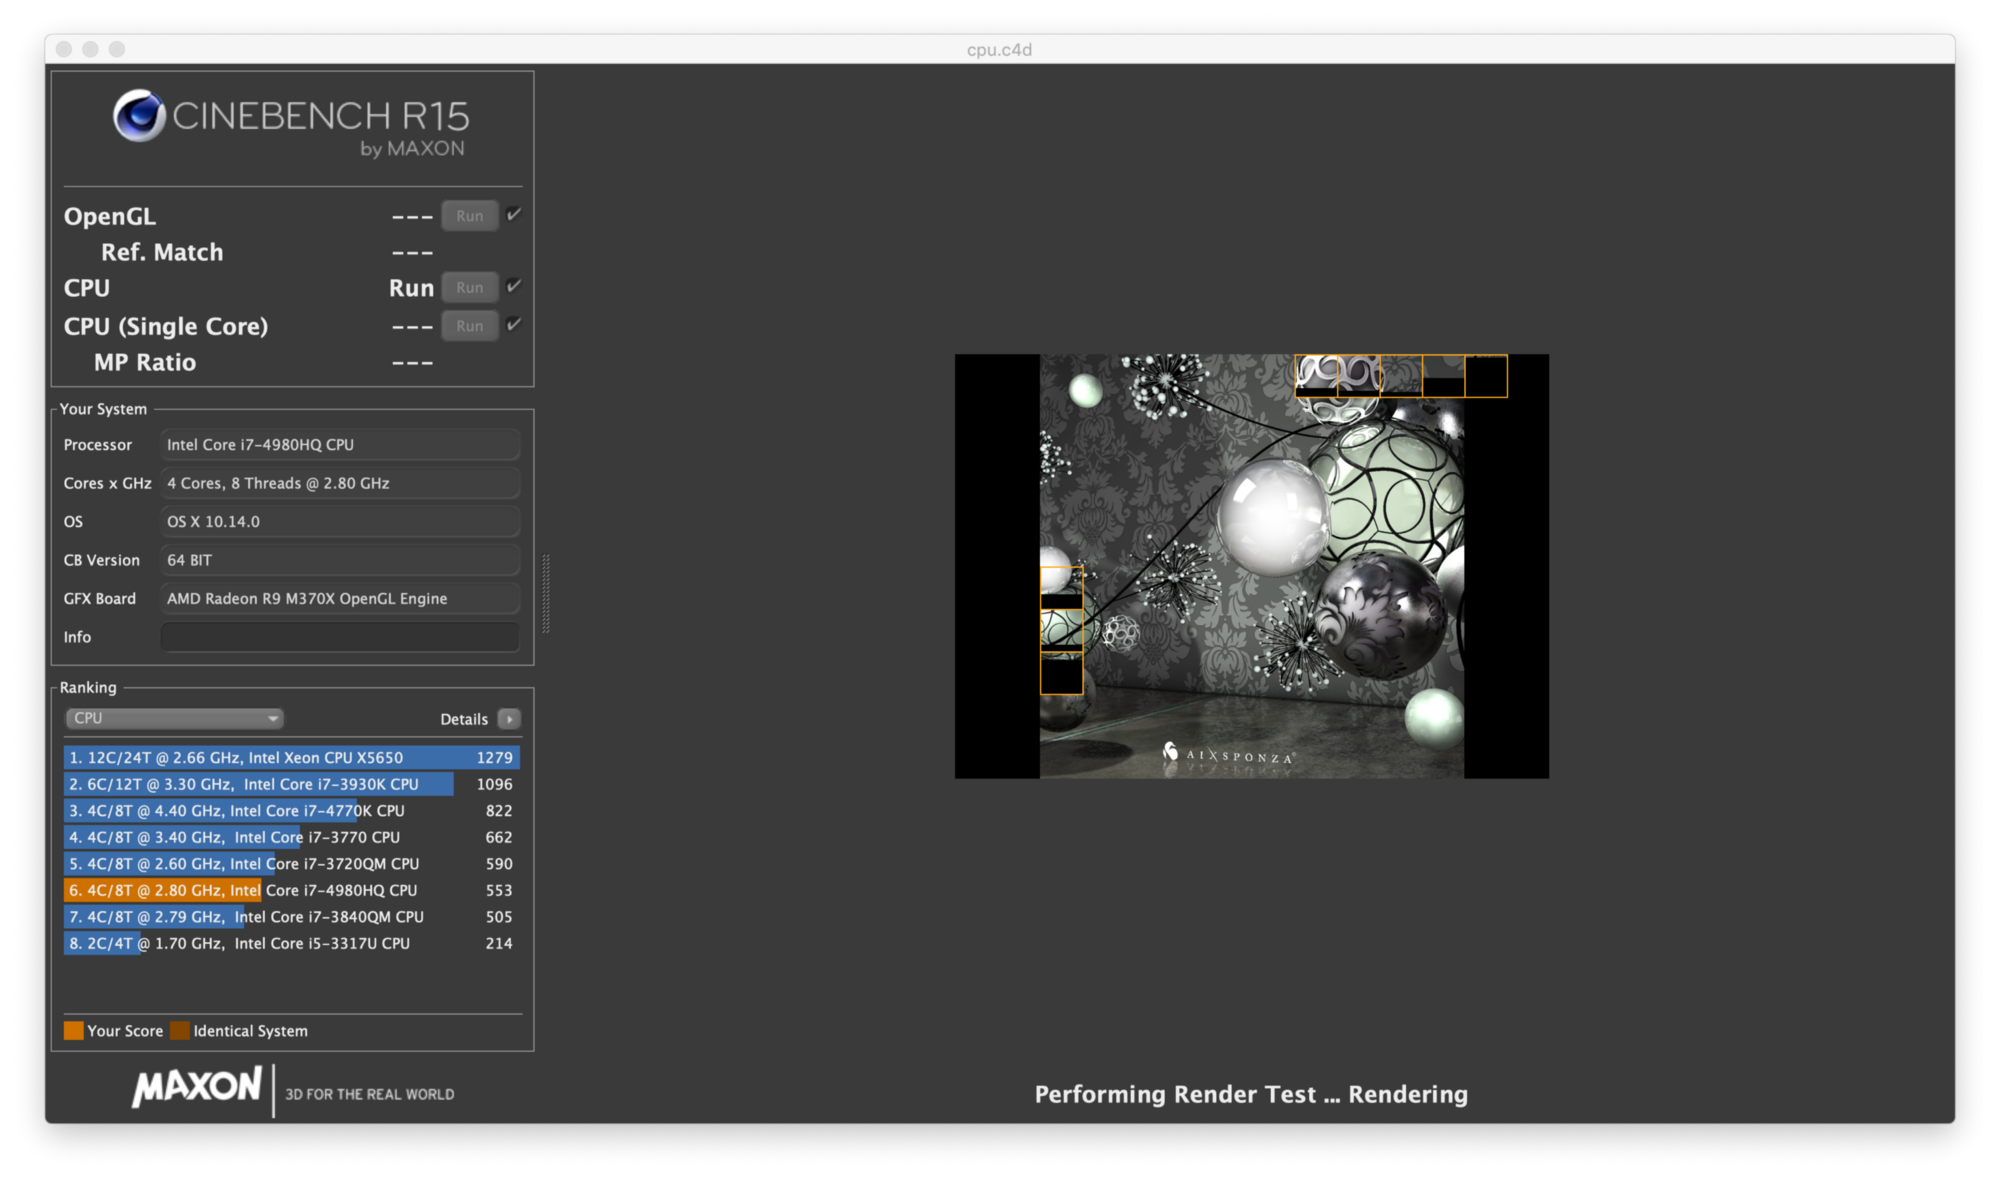
It is funny how Apple gives you the option to choose faster CPUs for a higher price tag, yet are bottlenecked by the MacBook’s flawed cooling system. My MacBook, for instance, has the best Core i7 processor (4980HQ) that was available at the time of purchase, but performs more or less the same as the other slower options.
To remedy the situation, I investigated my 15-inch MacBook Pro Retina’s (Mid-2015) cooling system and tried to find a solution. The reason behind this was that it saddened me to see the lower performance I was getting vs. what it should had really been.
There are some basic notions you need to know before we start:
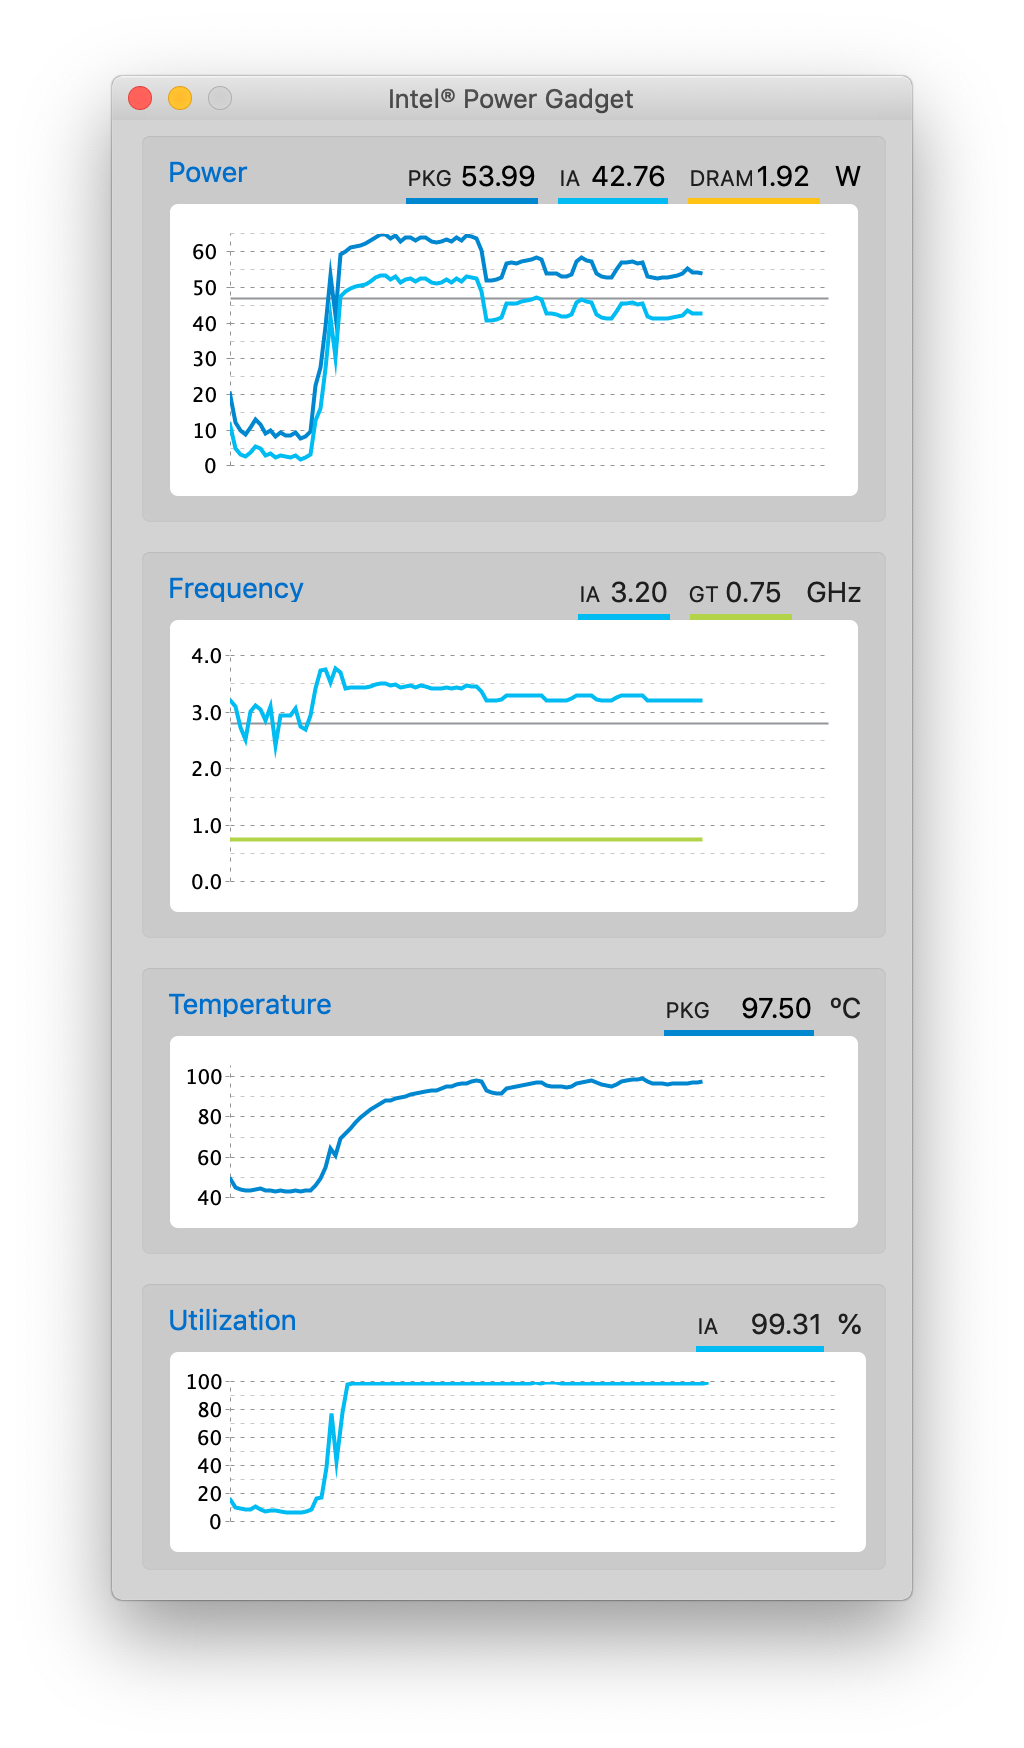
- Turbo Boost is the name given by Intel to its CPUs’ capability to increase their operating frequencies in case demanding tasks are present. In my case, the 4980HQ can run upto 3.8 GHz (Turbo Boost for 4 cores), but only achieves 3.2 GHz due to the thermal throttling.
- The Core i7 used in the Mid-2015 15-inch MacBook Pro is of the Haswell architecture and has a T-junction temperature of 105°C. This temperature indicates the precise moment where the processor has to decrease its max frequency in order to cool itself so that it doesn’t overheat (3.2 GHz vs. 3.8 GHz).
- CPUs and GPUs generate a lot of heat, which has to be displaced somewhere else and eventually expelled outside the chassis of the computer, usually by the aid of fans. Copper is often used in heatsinks instead of aluminum because it has better thermal conductance, but is also more expensive. TDP (thermal design power) is the maximum amount of heat that can be generated by a chip (CPU or GPU). The 4980HQ has a TDP of 45W and a cTDP (or configurable TDP) of 65W (extra CPU speed if the extra heat is manageable by the cooling system).
We may now begin.
First things first: Let’s see how fast the CPU core temperature increases when under load (stress testing with CineBench R15, monitoring with Intel Power Gadget).
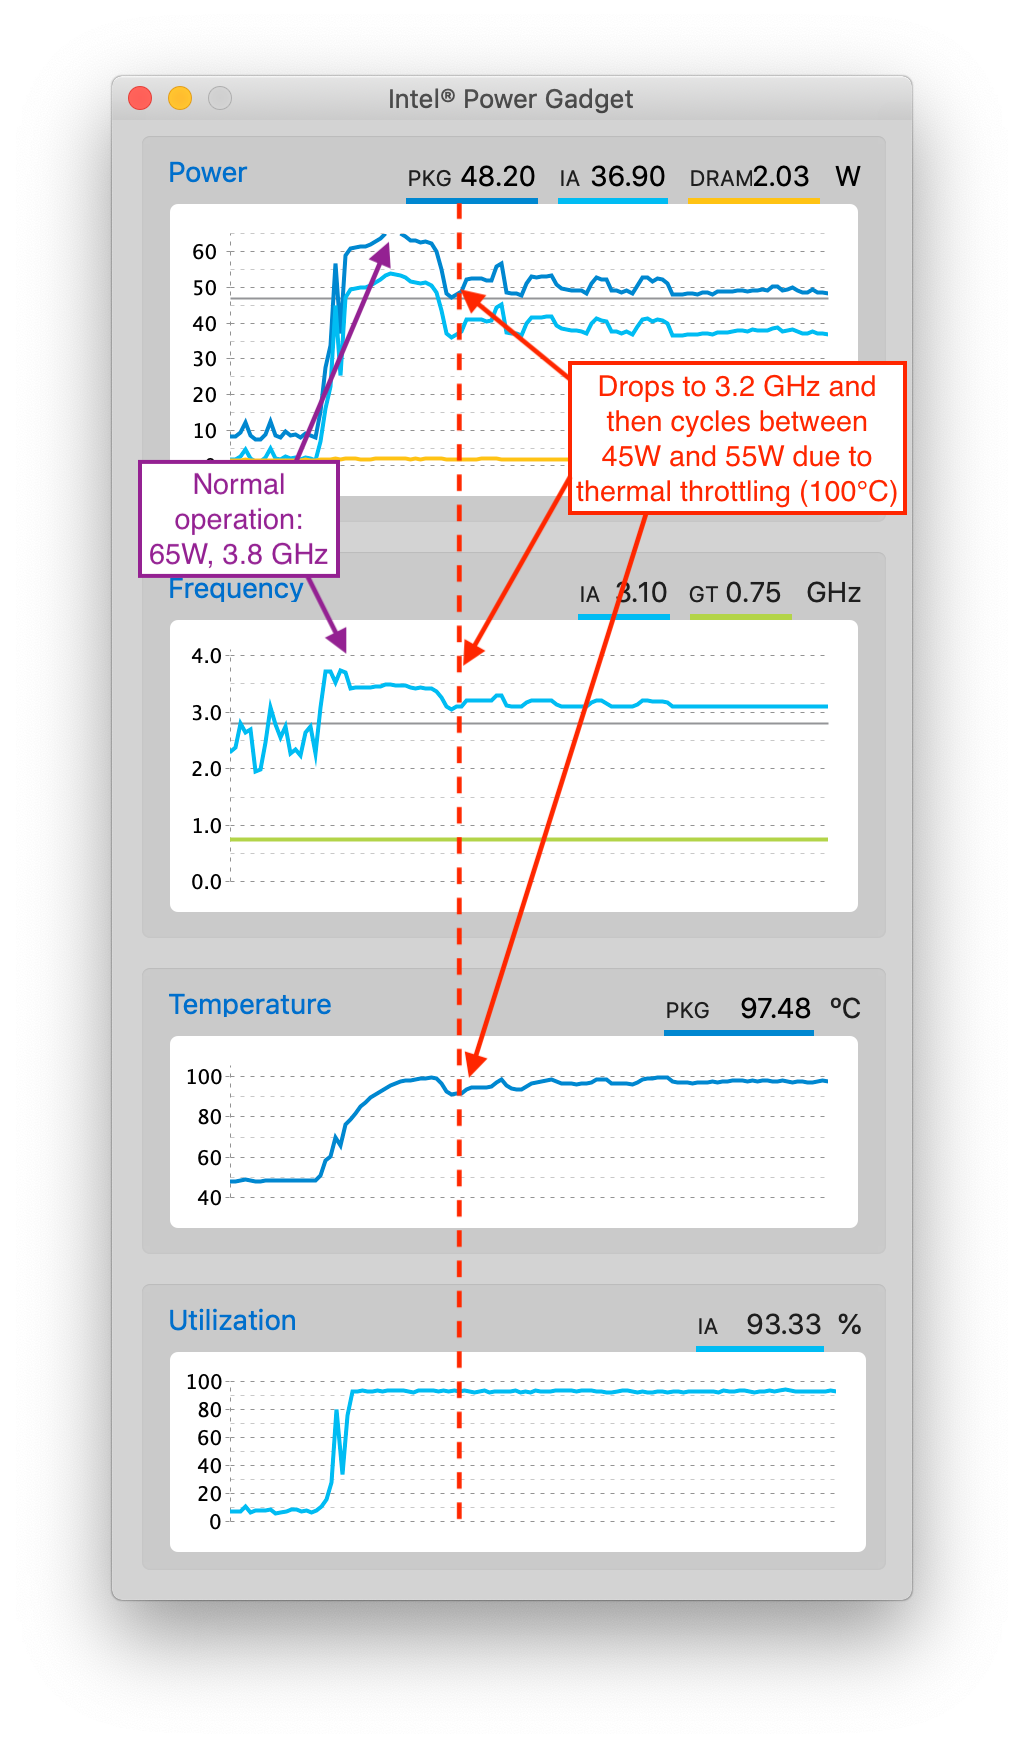

Yup, as you can see, we’re thermal throttling. Badly.
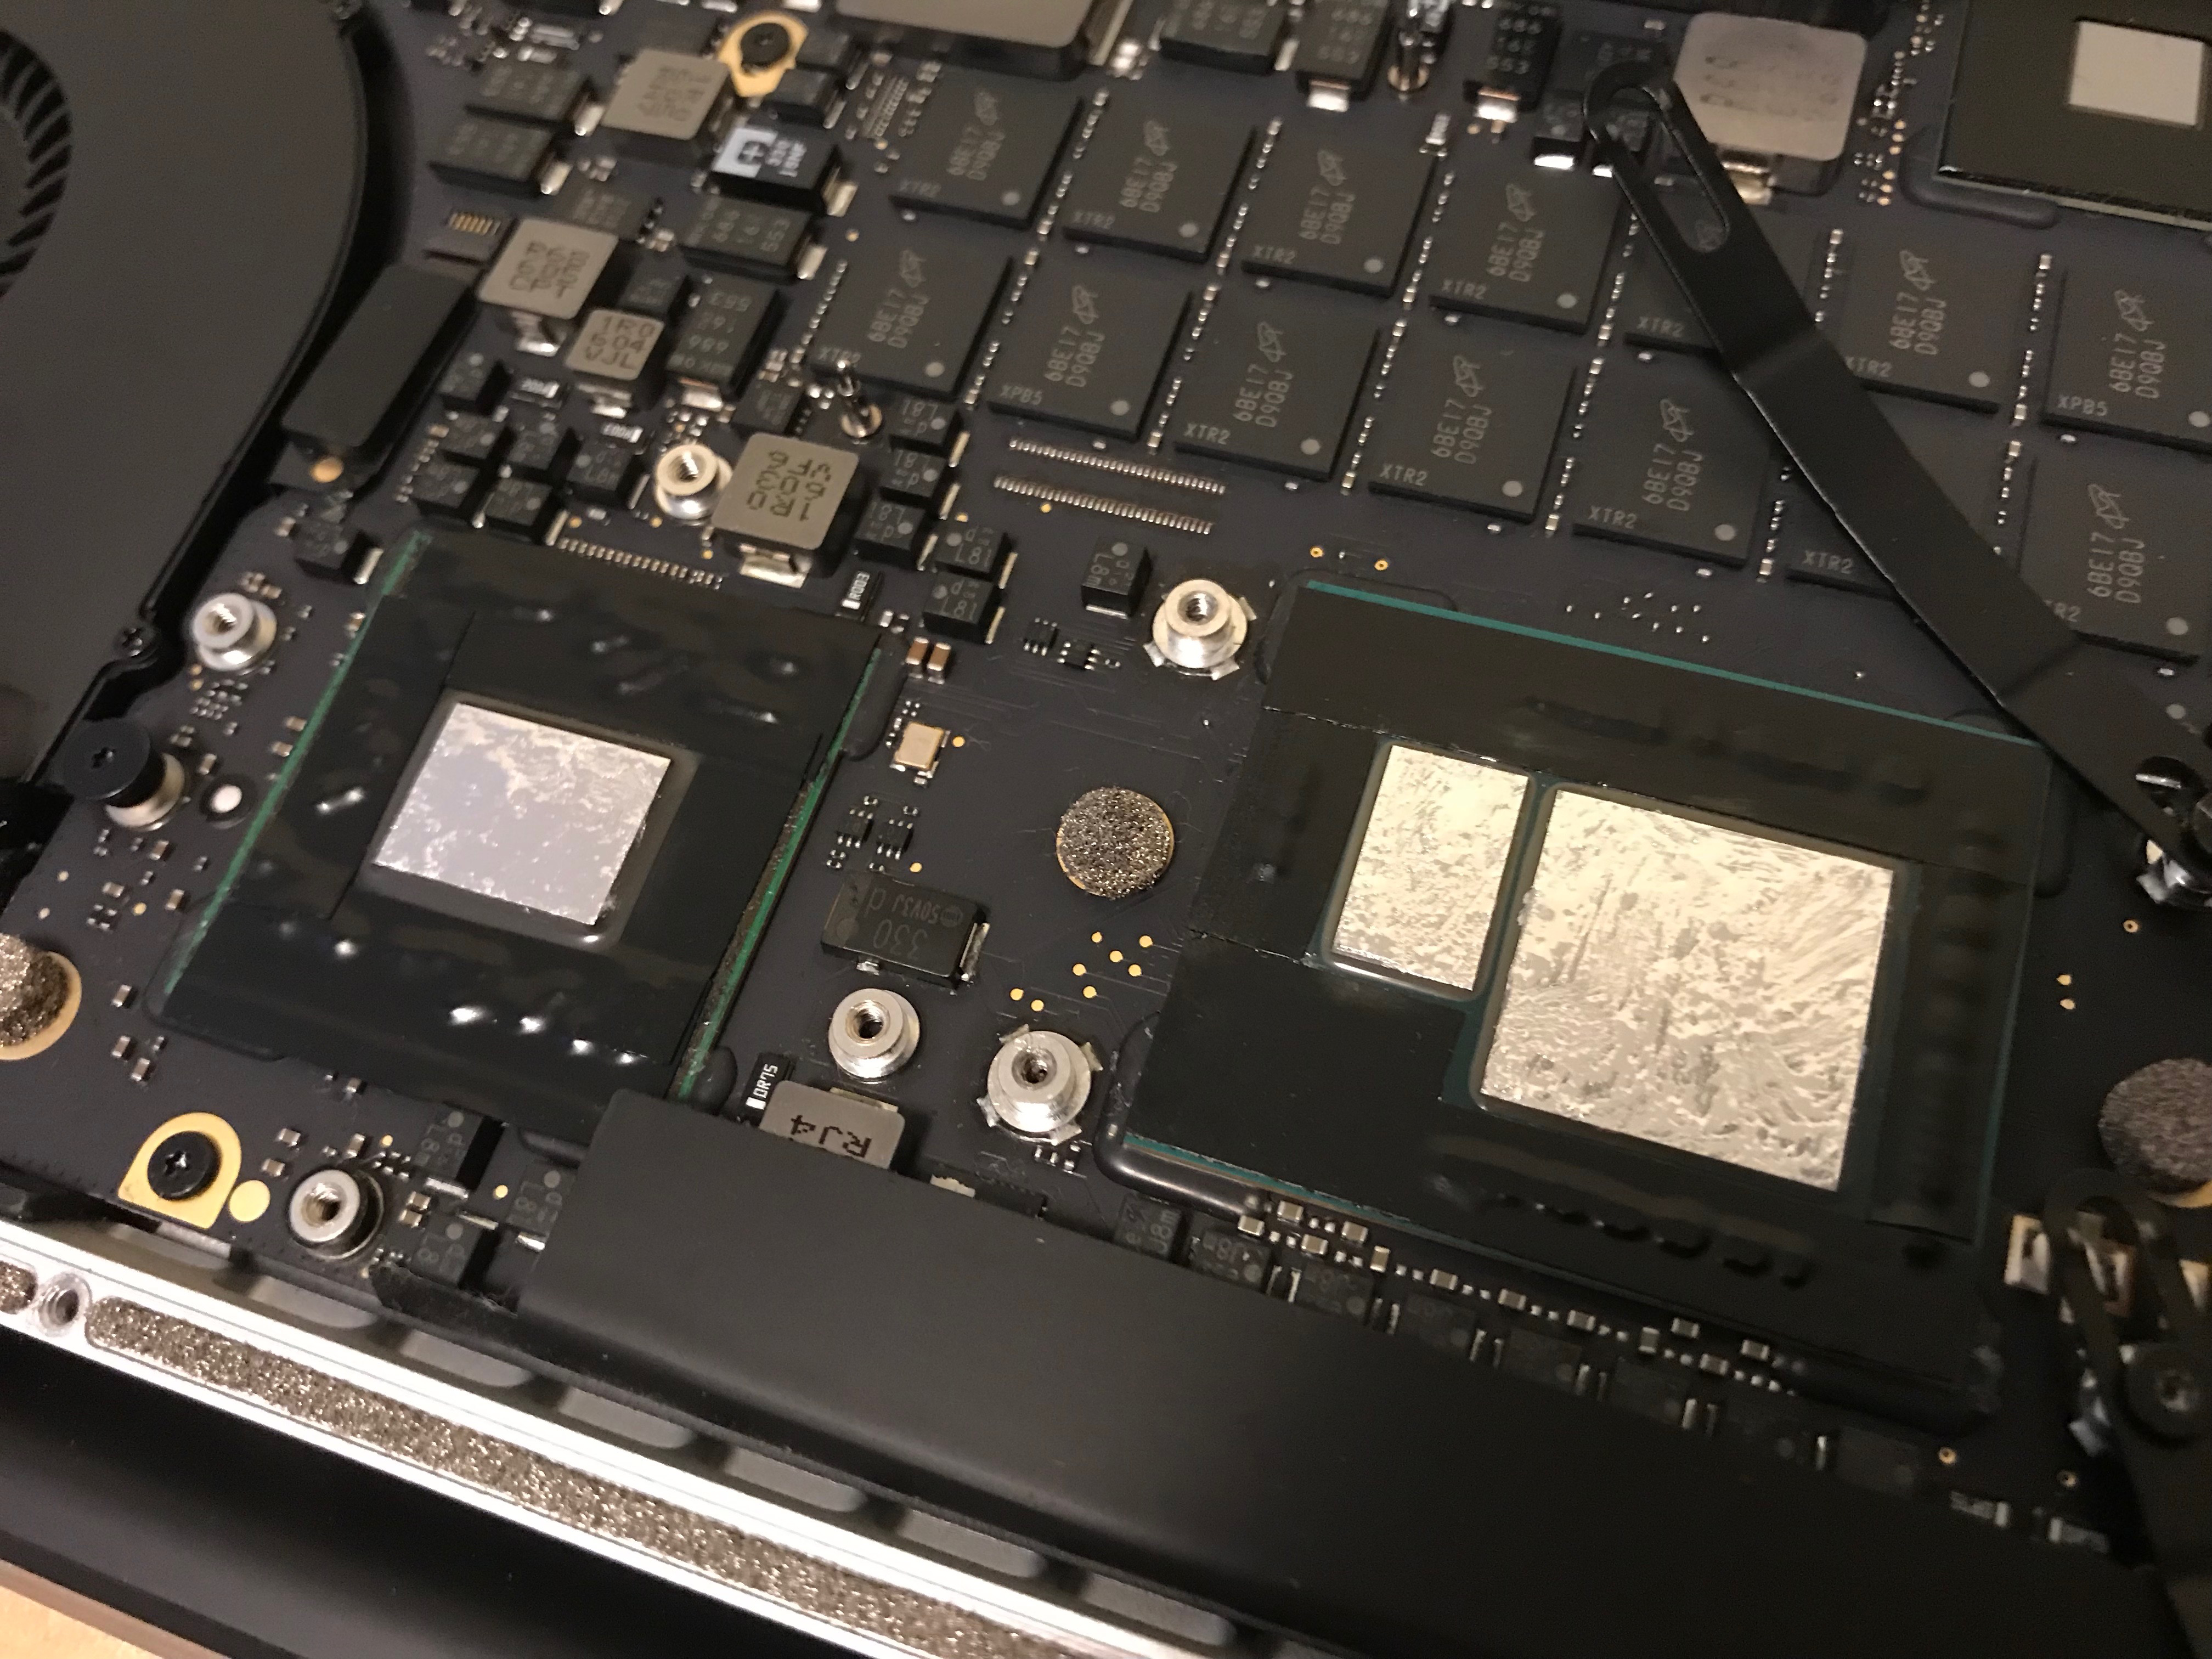
Now let’s remove the MacBook’s bottom cover and have access to its insides.

We can see that the heatsink is very small and not adequate for a 45W CPU (65W with Turbo Boost).
There are many ways to improve the cooling system.
Here are a few I am considering to accomplish:
(A) (done) Changing the thermal paste for a liquid metal substitute.
Result: Biggest improvement, but not definite solution as the system still thermal throttles.
(B) (done) Bridging the heatsink to the chassis (bottom cover) with thermal pads, so that heat dissipation is improved.
Result: Considerable improvement, especially for the GPU, but we want to improve the cooling on the CPU!
(C) (done) Making the heatsink thicker by adding copper shims to it.
Result: Surprisingly, quite disappointing. There is improvement, but a very minor one.
(D) (not done, only an idea) Adding a large copper plate over the CPU/GPU.
We have to take into account that the less invasive the procedure is, the less risky it also is.
Conclusion: Unfortunately, the thermal improvements were decent, but not satisfactory. Hence, I would not recommend doing this. Only proceed if you know exactly what you are doing!
— — — — —
Disclaimer: We assume no responsibility for any damage caused to your personal goods. If you have zero experience in this matter, you WILL break your stuff. Use this guide at your own risk.
This guide will only present solution (A), since it had the largest impact.
iFixit has a superb guide on how to open your MacBook and remove the heatsink (click here).
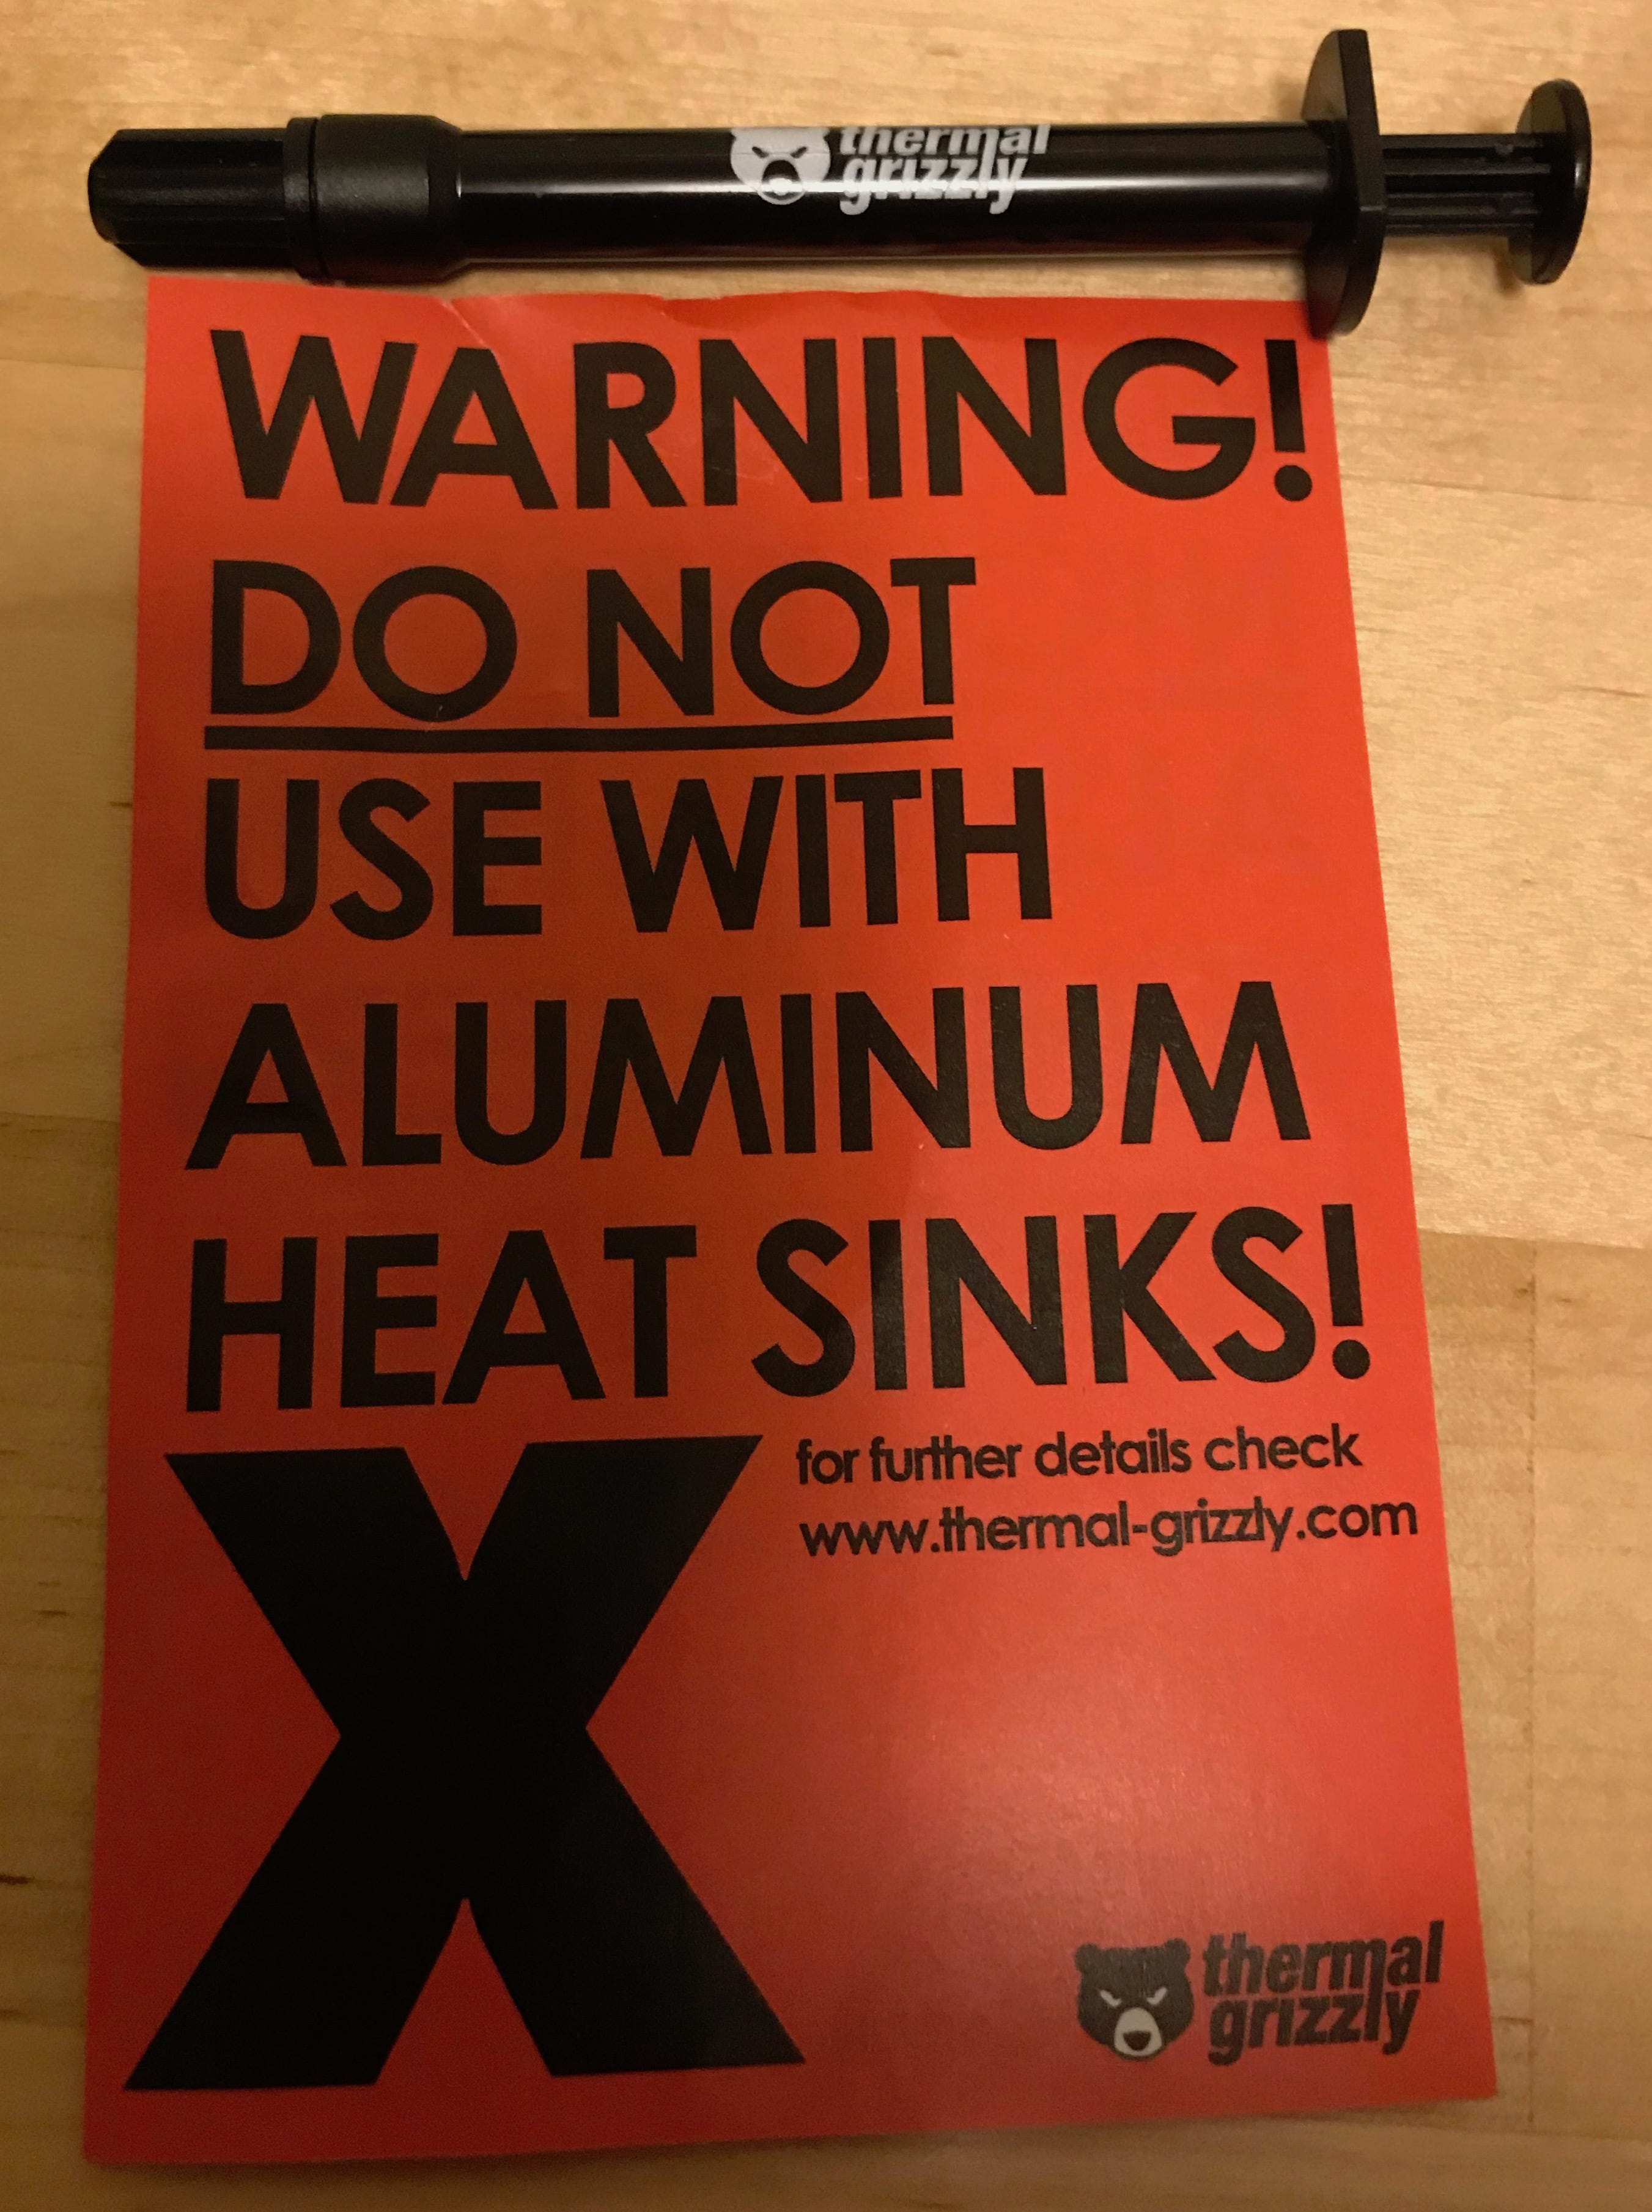
The liquid metal compound I will be using is Thermal Grizzly Conductonaut.
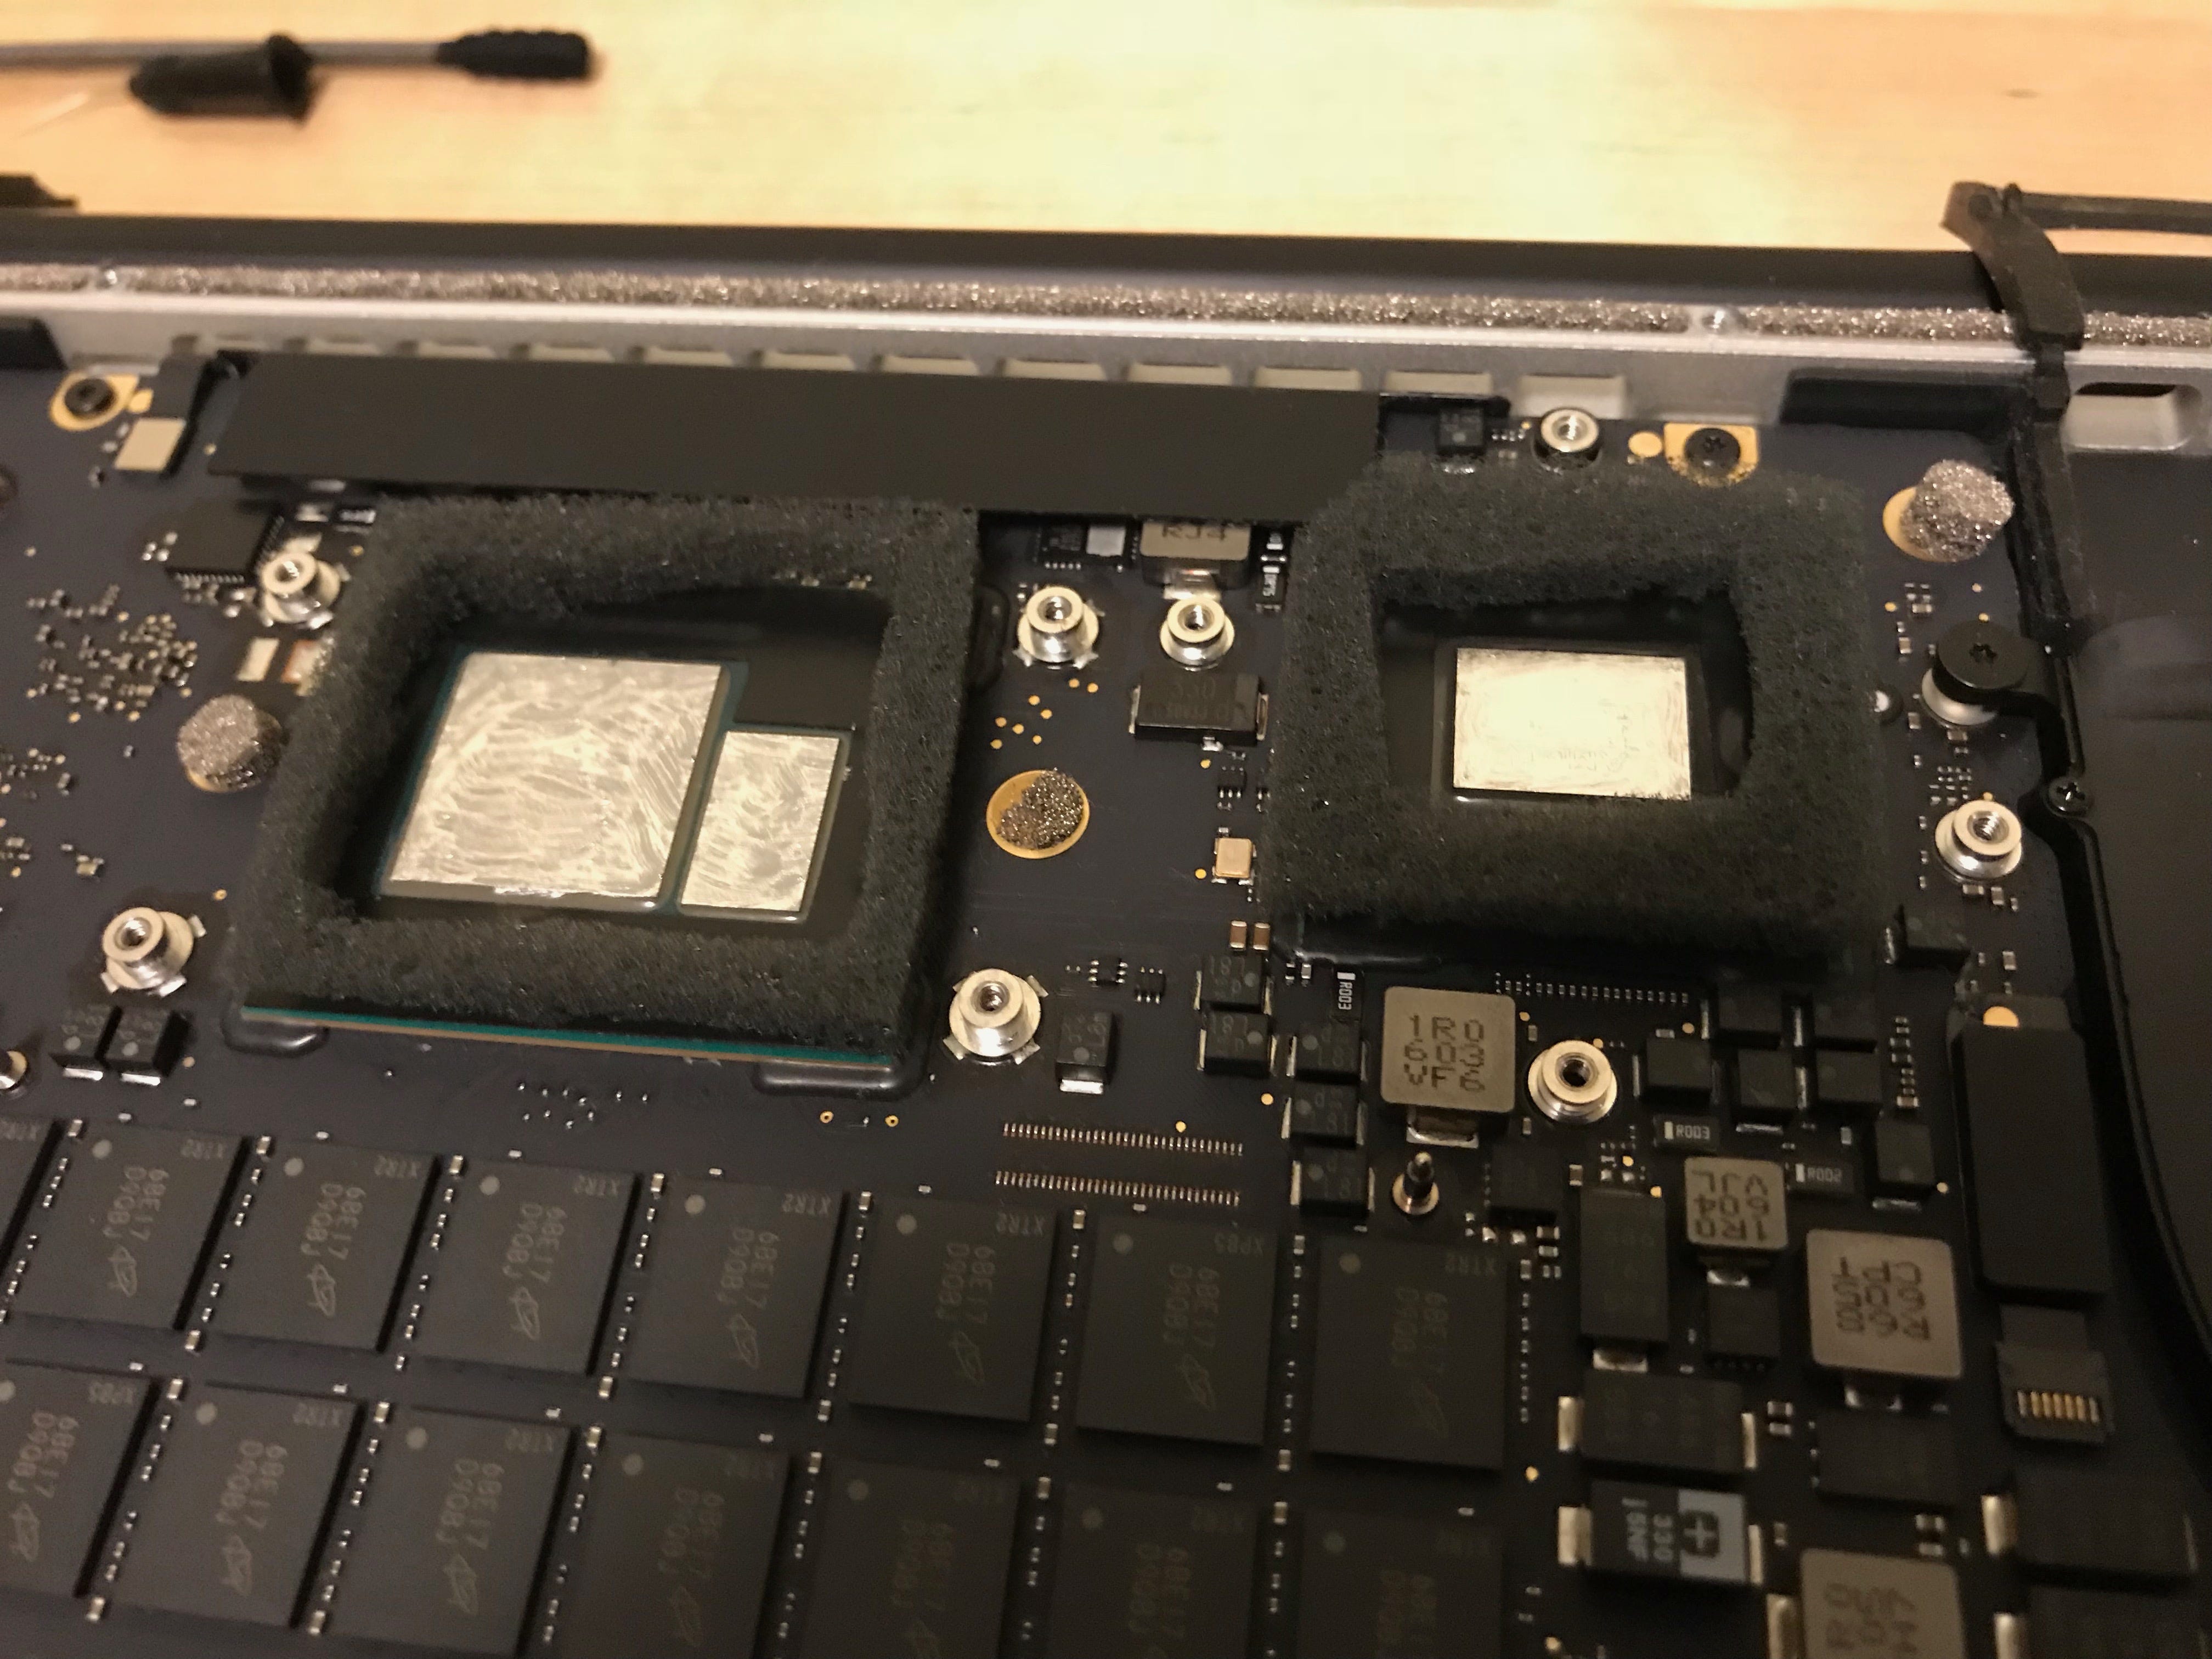
The SMCs on top of the chips have to be masked using electric tape or conformal coating (I recommend using 3M Scotch Super 33+ Tape or MG Chemicals Silicone Modified Conformal Coating). Here, I only used electric tape. Note: The tape must only be ONE layer, or else, it will prevent the heatsink from making proper contact with the CPU.

The layer of liquid metal on the dies has to be thin. Extreme care must be taken, since any excess might spill out and kill the components on the logic board (this compound is electrically conductive).
As a side note: DO NOT USE WITH ANY ALUMINUM HEATSINK AS THE LIQUID METAL WILL REACT WITH IT AND DESTROY IT.

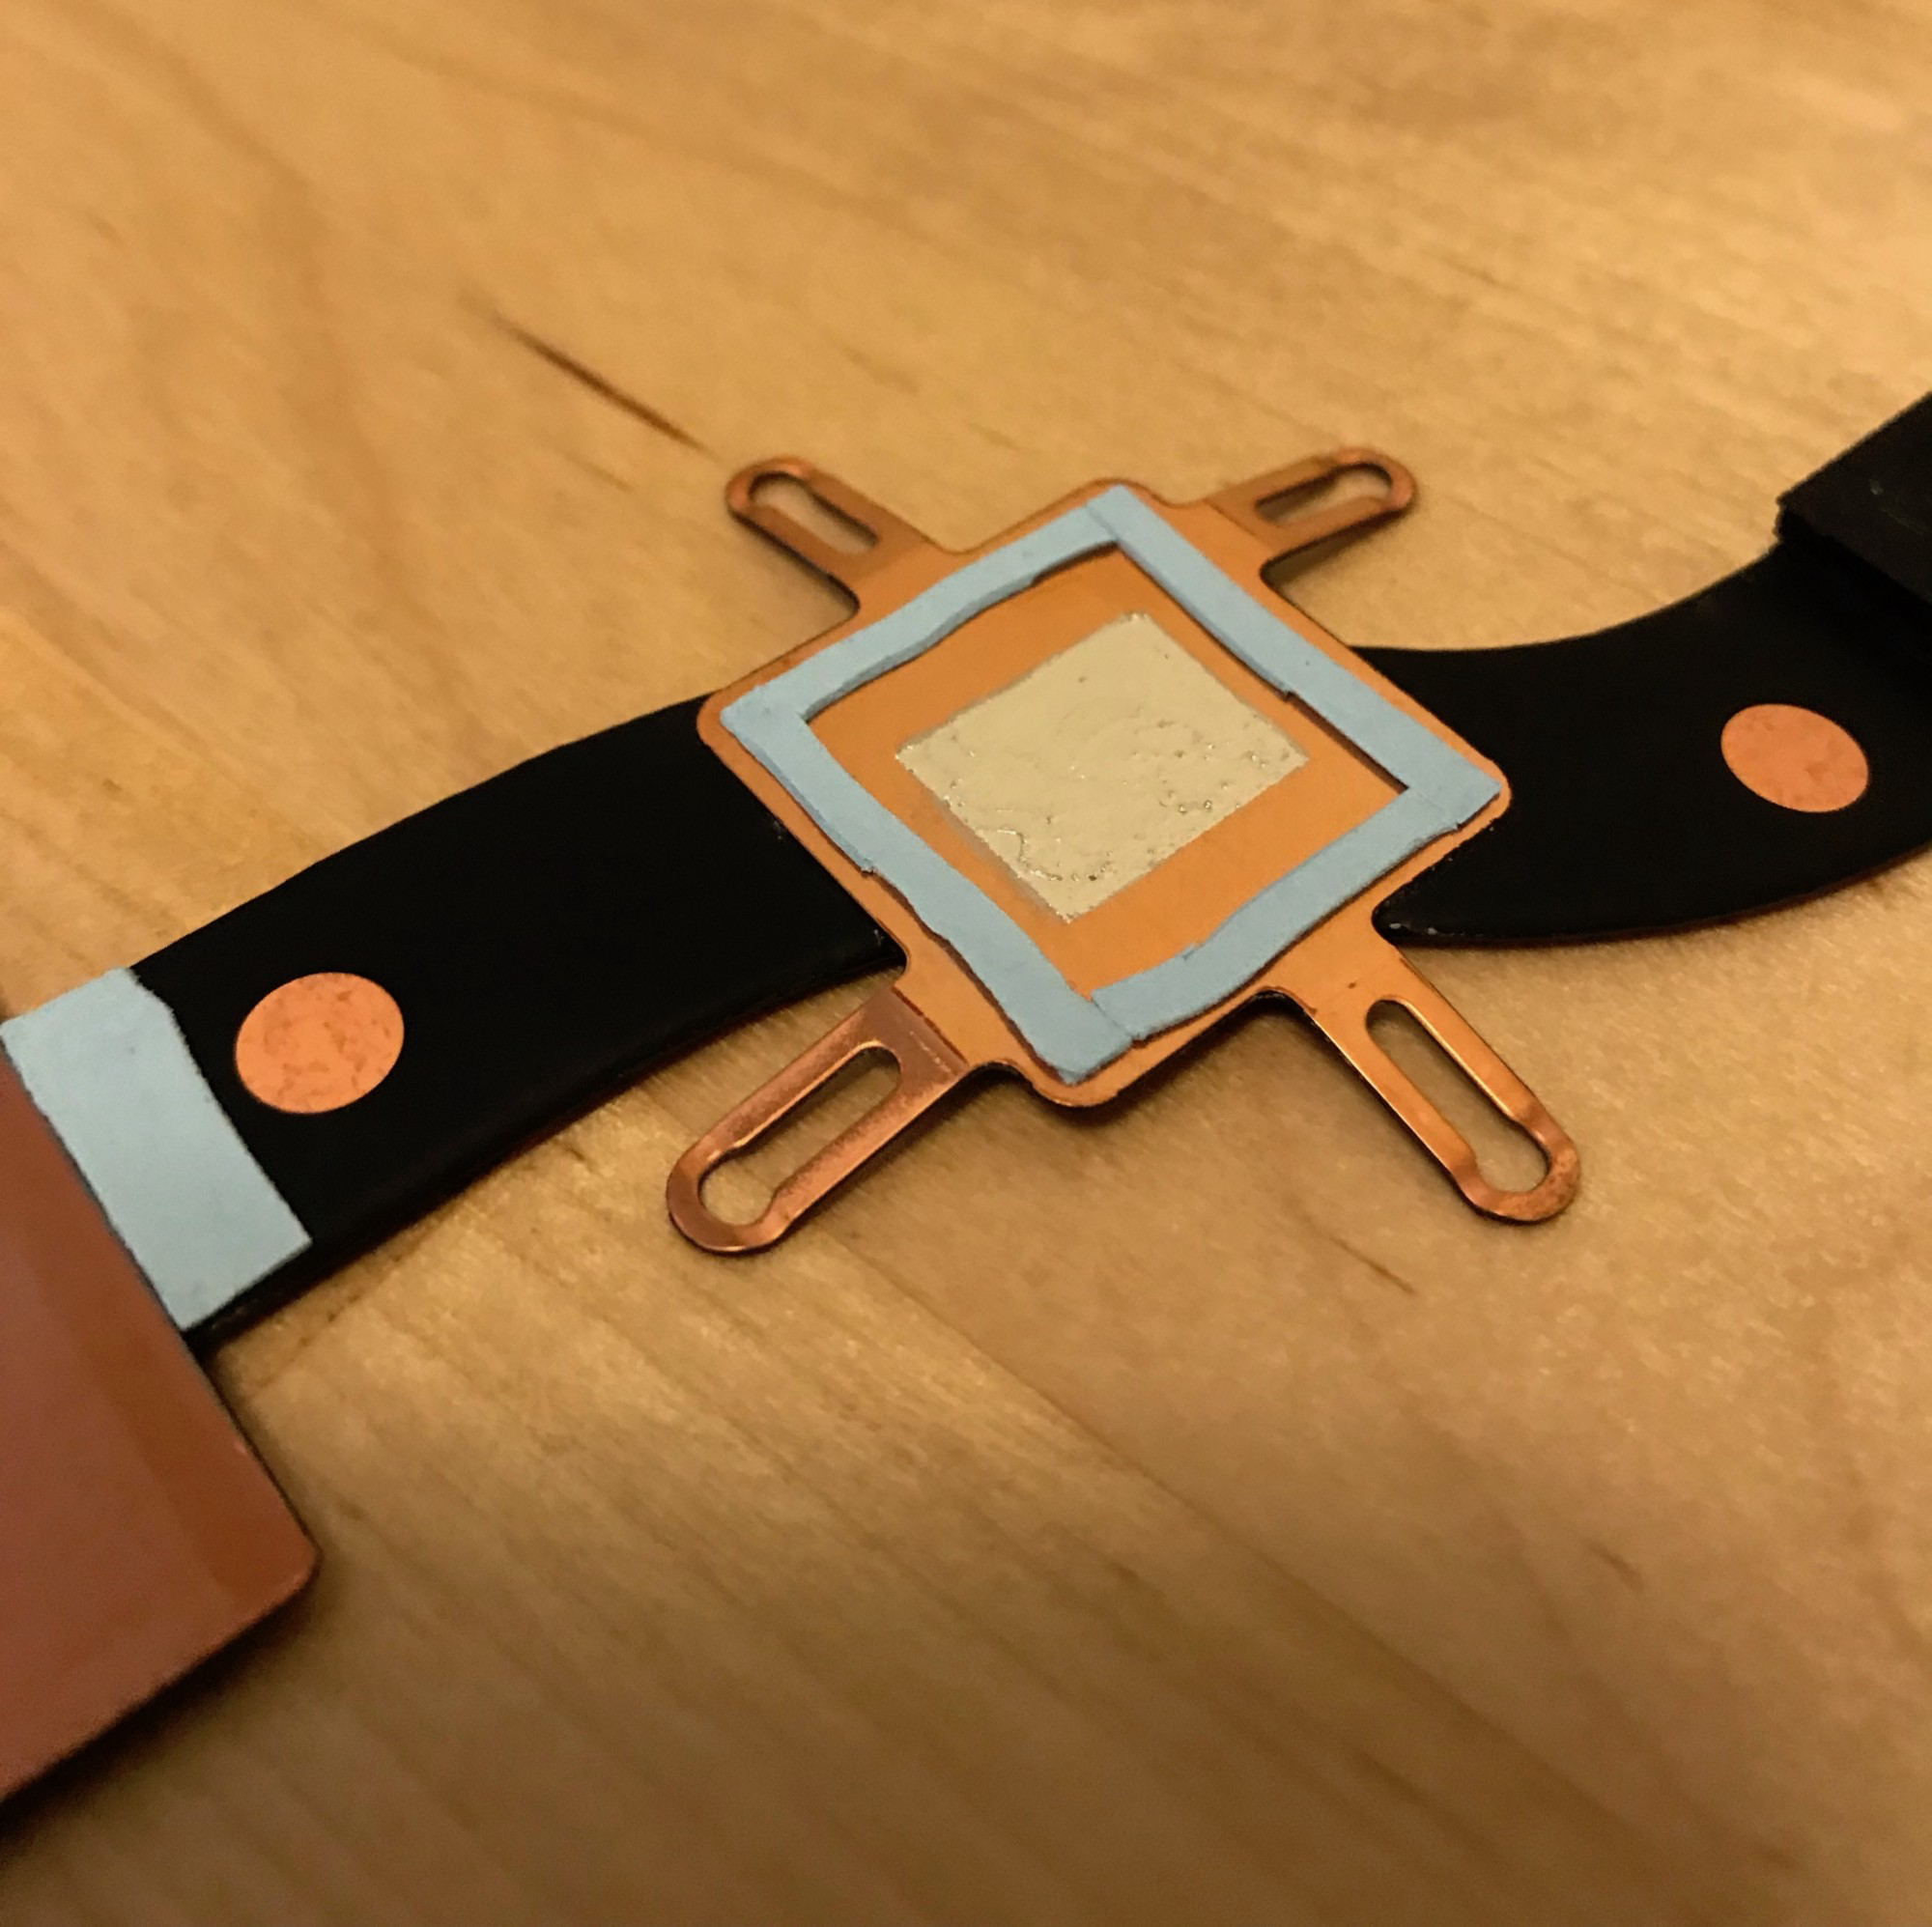
The Liquid Metal also has to be applied to the copper heatsink. You can use some Scotch Magic Tape like I did here to mask the regions that will not make contact with the CPU die.

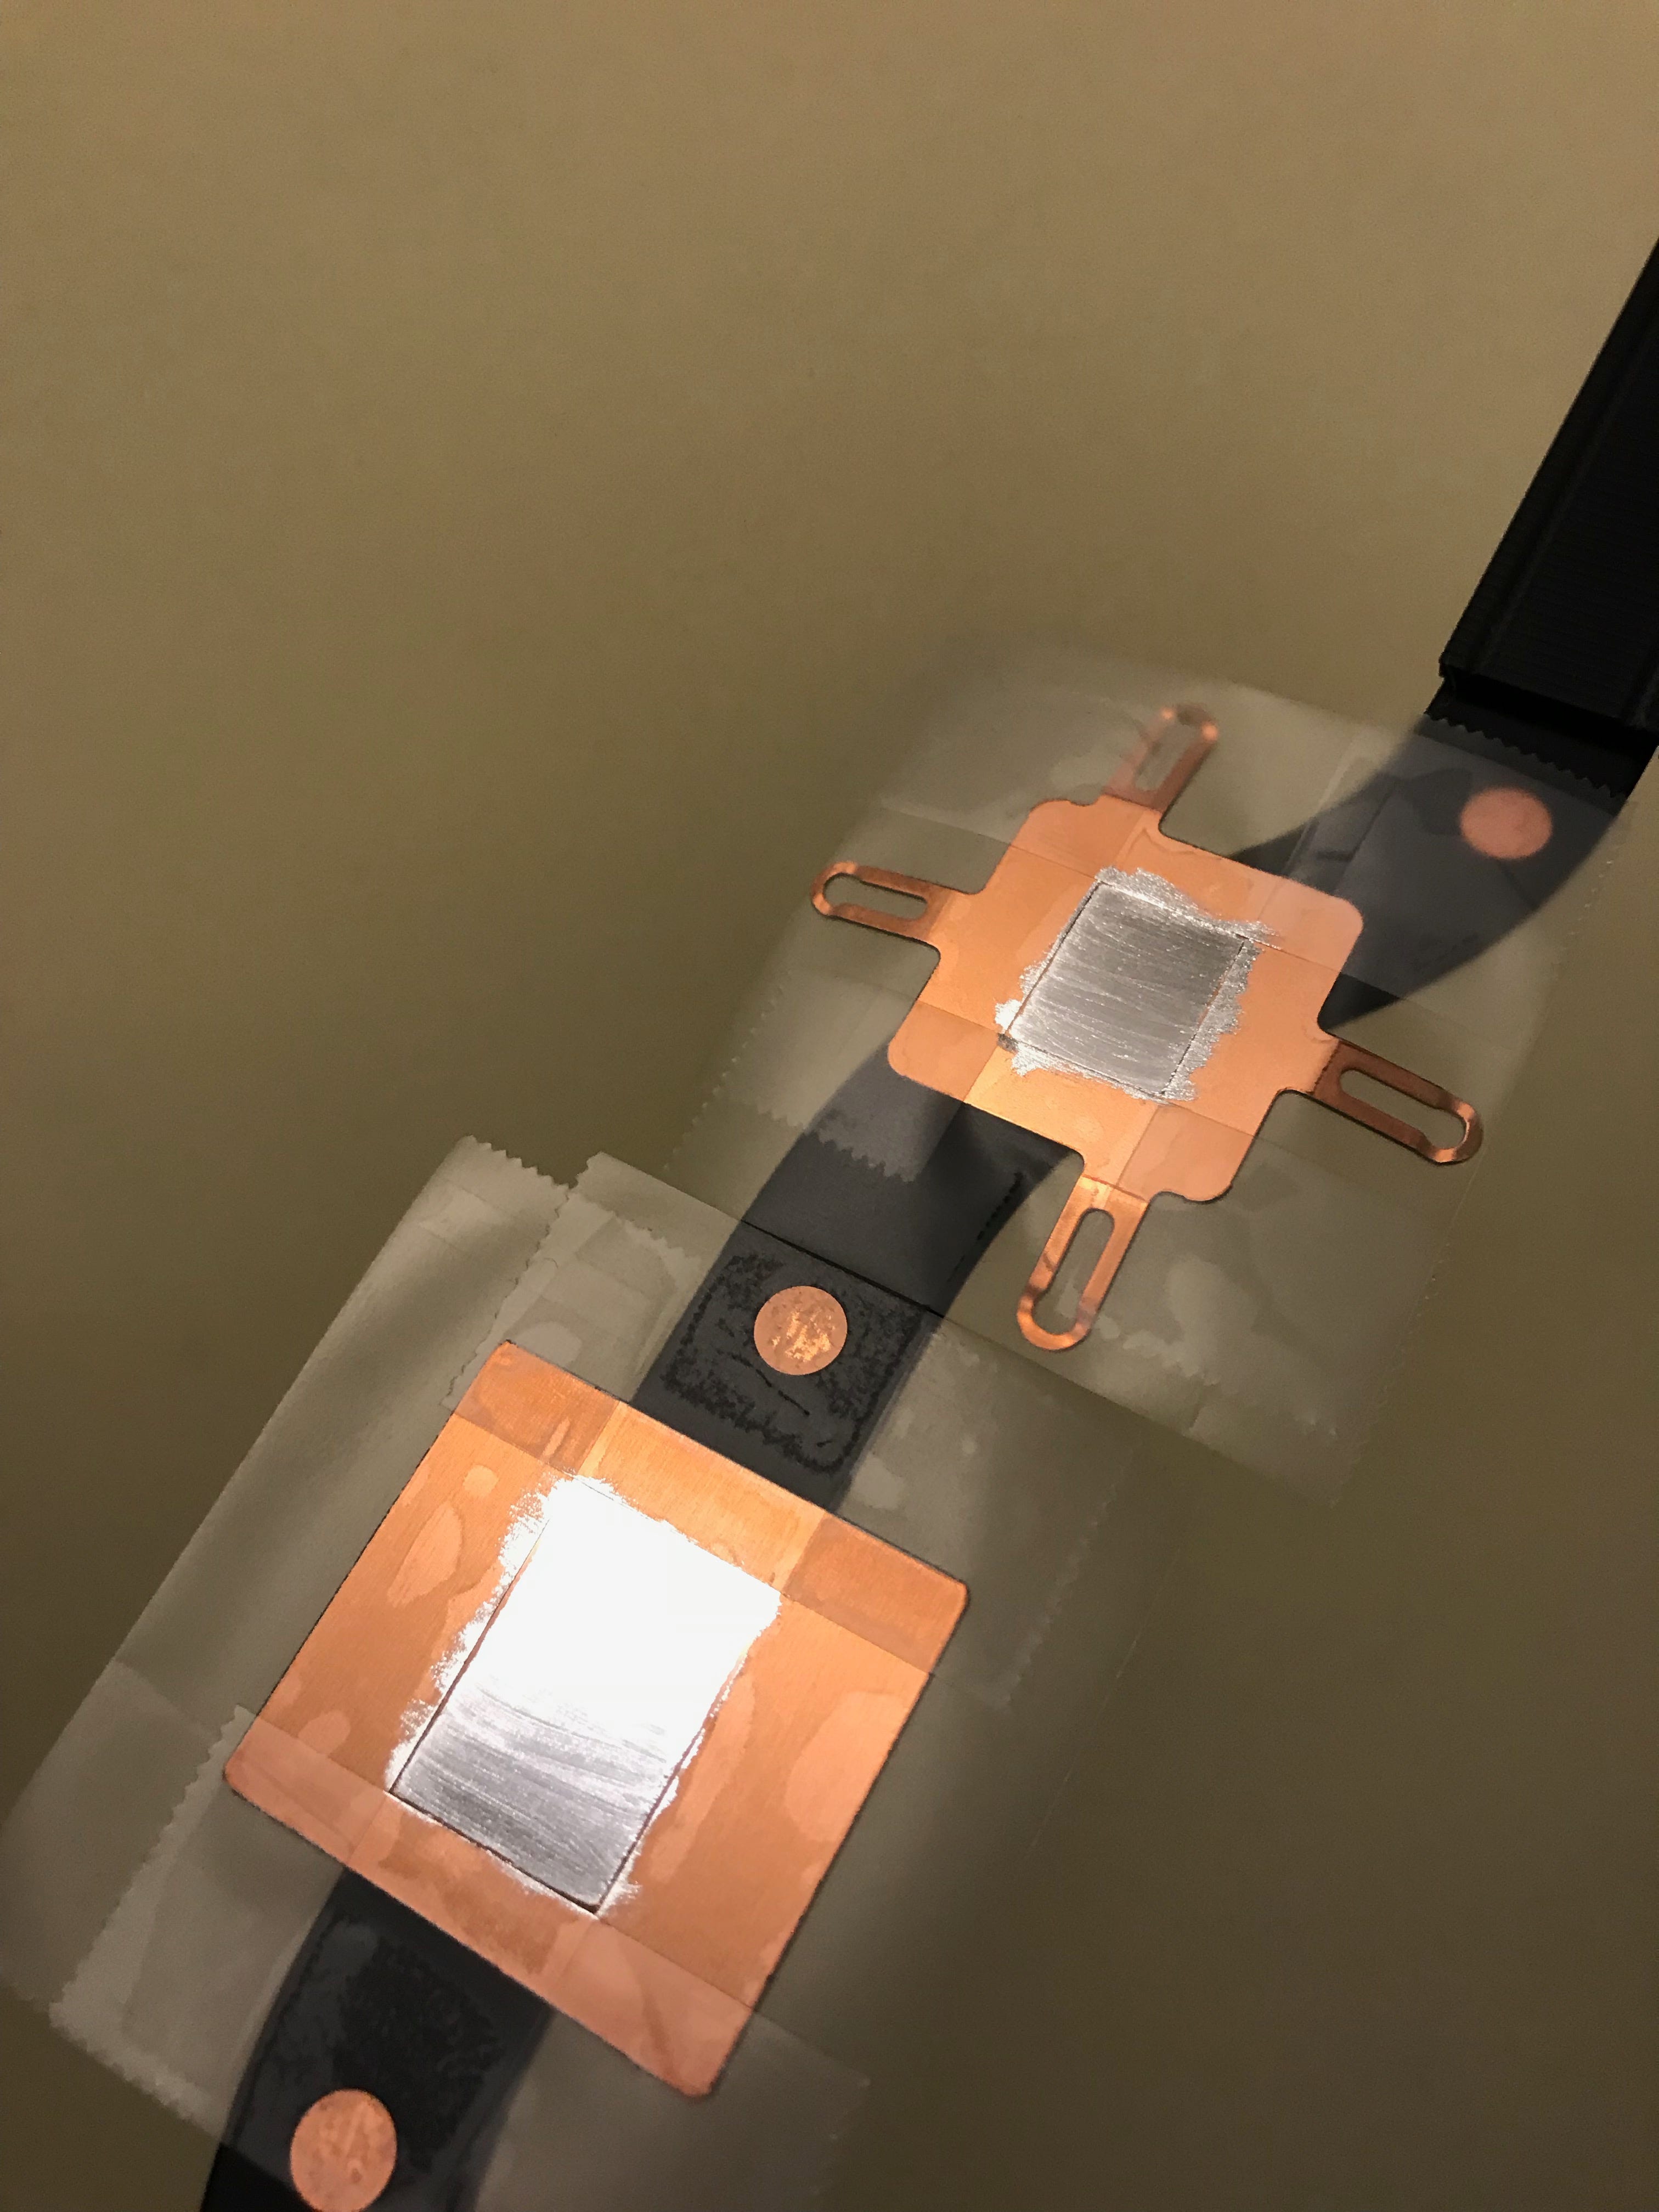
I also used some thermal pads (0.3 mm thickness) to seal up the area on the heatsink that will make contact with the die to ensure that the liquid metal doesn’t leak out to the logic board and kill the components on it.

Optional: You can also use thin foam pads instead like in the following picture. Make sure that they are highly compressible.
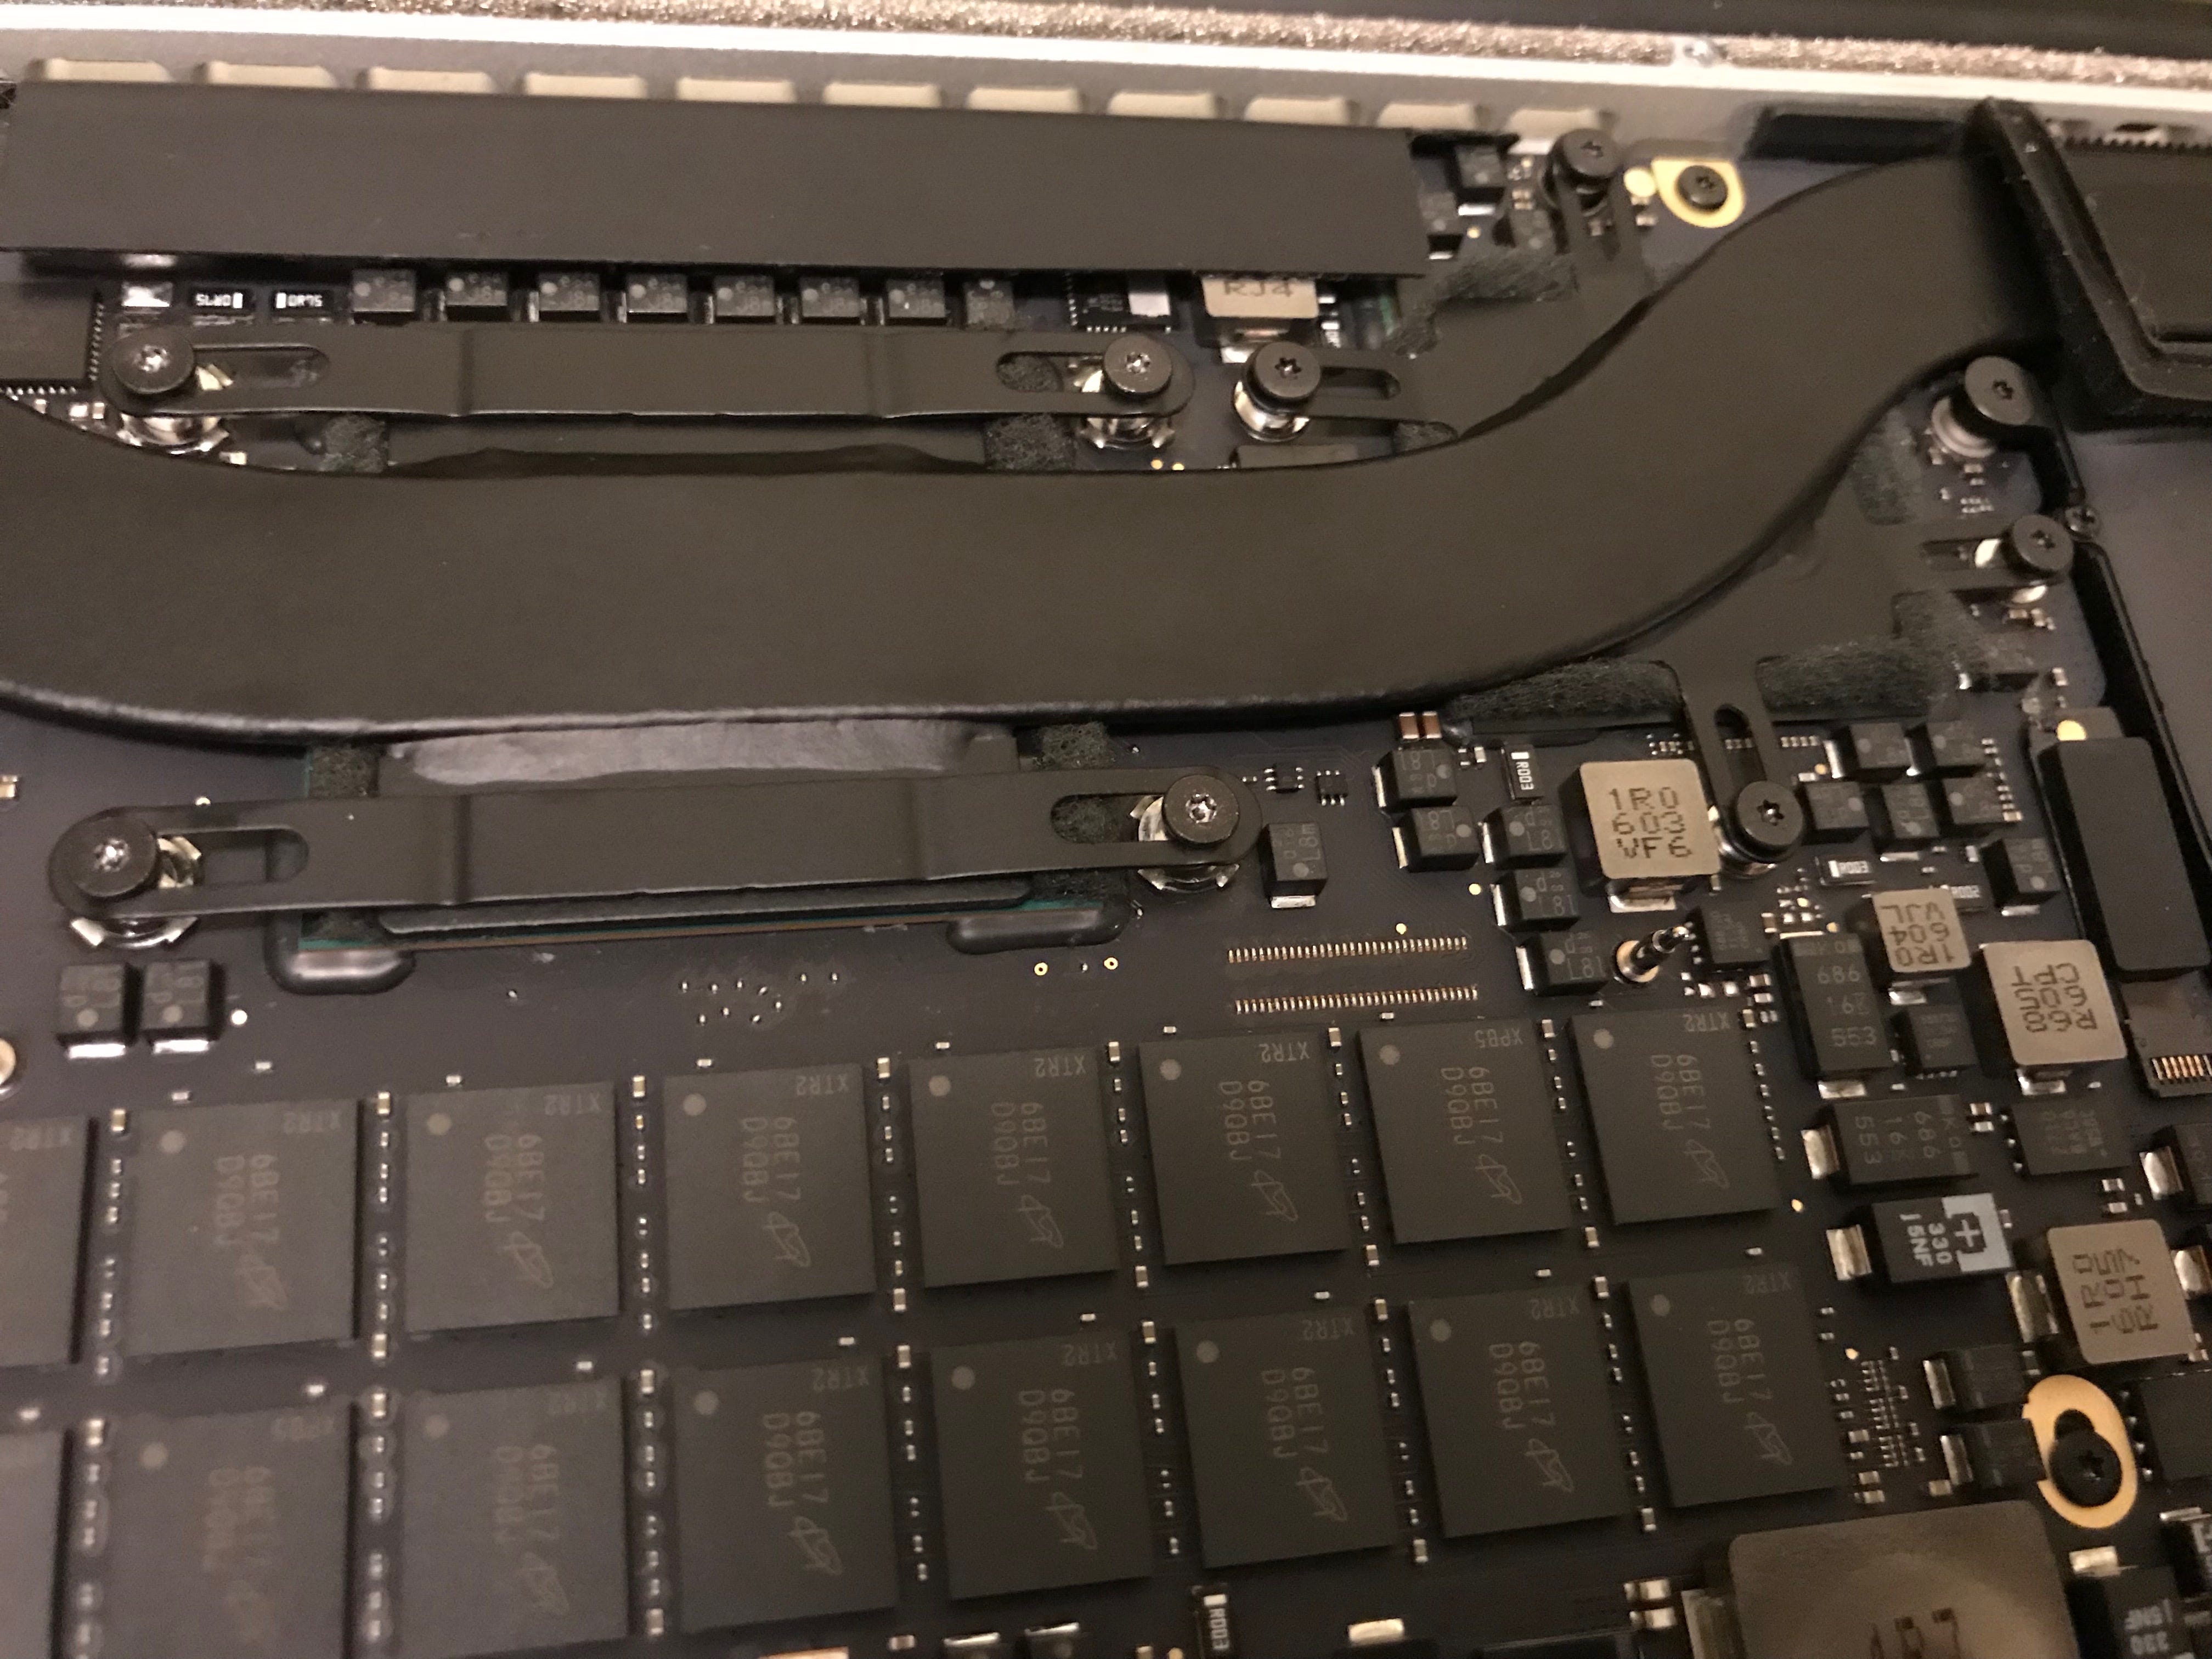
Always, I repeat, ALWAYS make sure that there is proper contact between the heatsink and the CPU and GPU dies, or else, you will get worse results!

Lastly, screw the heatsink back onto the logic board, replug the battery and put the bottom cover back on.

As predicted, it takes more time for the CPU to reach T-junction temperature with the liquid metal than with the stock paste. In addition, the CPU is also able to achieve a higher clock speed (3.20 GHz vs. 3.10 GHz). We also have to take into account that the fans do not spin up as often because the CPU is generally cooler. To observe a more accurate outcome, you can manually set the fans to higher speeds.
Quite unhappy with these results, but an improvement is an improvement!
I tried the replacing the thermal paste with Arctic M4 and bridging the heat sink to the chassis using 1.5 mm foam for Macbook Air M1 2020, as shown by:
I do not have 1.5 mm foam so I used 1 mm and 0.5 mm foams on top of each other.
For a Macbook Pro A1398 but a slightly different model:
My Macbook does not have a separate chip for the GPU. There is a small chip next to the CPU in my Macbook motherboard so its heatsink does not have the 4 screws for the GPU.
 |
| After replacing thermal paste with Arctic M4 and 1.5 mm foam. Earlier, it was 97 degree C using Prime95 stress test option for a few seconds only. |
http://www.mersenne.org/ftp_root/gimps/p95v298b7.MacOSX.tar.gz

Comments
Post a Comment